Printing with a Royal LetterMaster
I’ve been meaning for some time to either hack up a typewriter to use as a printer or get a nice daisy wheel printer. I’ve checked eBay every now and then for one, but ones that work with a computer tend to be more expensive and I didn’t really want to reverse engineer an old typewriter.
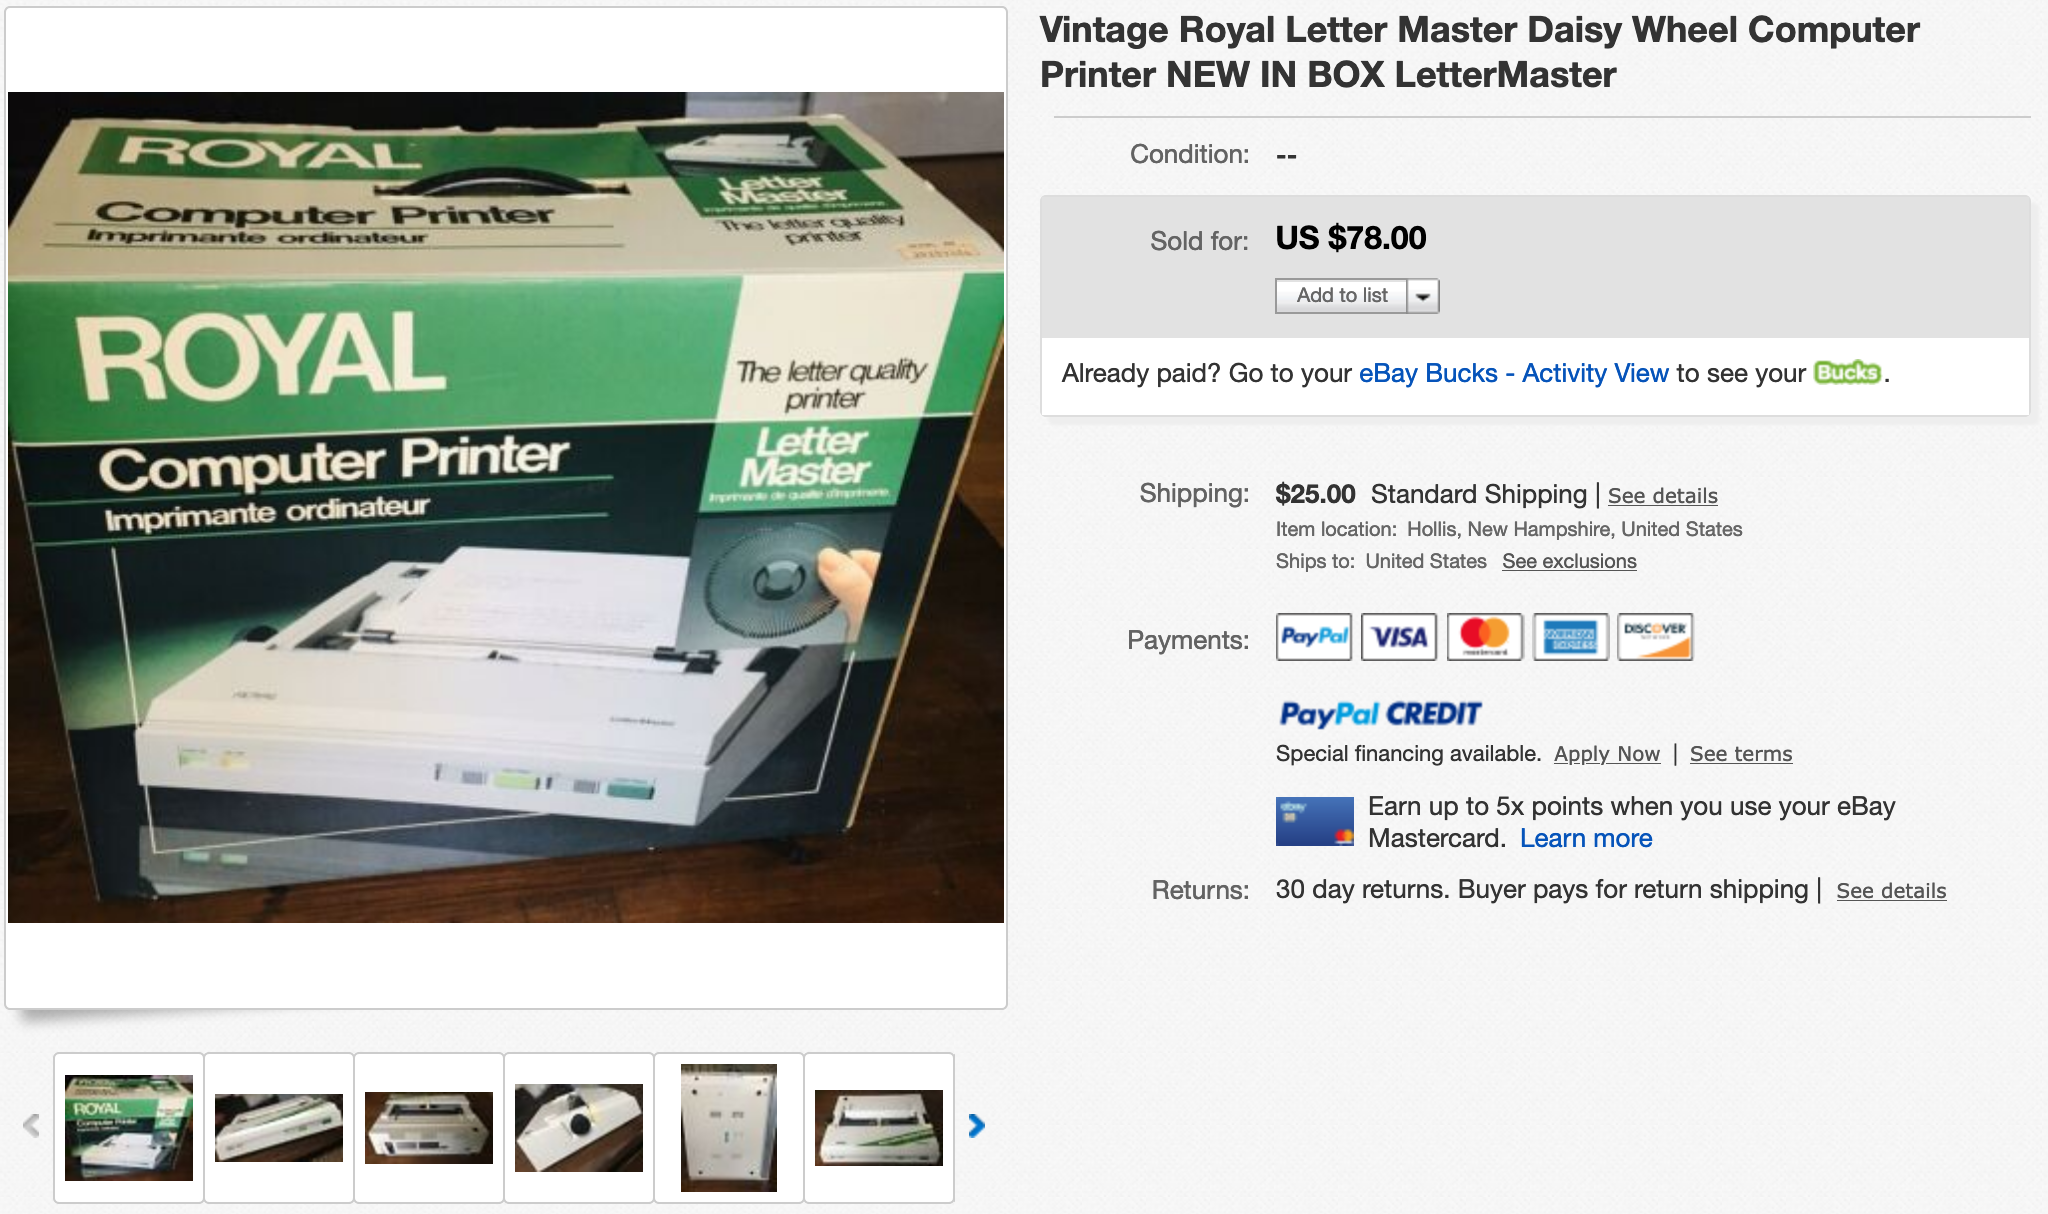
I was checking eBay the other day and this Royal LetterMaster popped up for around $100 shipped. This model wasn’t all that popular, but it had a standard port on the back and I figured that it wouldn’t be that hard to make work with CUPS or the like. I assumed that I’d be able to either find a ribbon or spool up a generic ribbon onto the existing ones. And if it didn’t work, I’d only be out $100 or could return it.
Unboxing the thing
I was pleasantly surprised to open up the box, remove it from the original packaging, plug it in and hit a few buttons to get a test page. The ink was a little faint, but that’s to be expected by something that’s about 35 years old at this point, per the FCC Filings.
It came with a supplies order form and a note about how to remove some bars for shipping, but it no manual. I did see that there was a little card with what ASCII sequences would enable bold, underline and some tab stops, though it turns out that those were pretty standard for the time.
Popping the cover back open, I didn’t see any ribbon and no place it would obviously be mounted. Without the manual, I wasn’t sure if it was missing parts.
Figuring out supplies
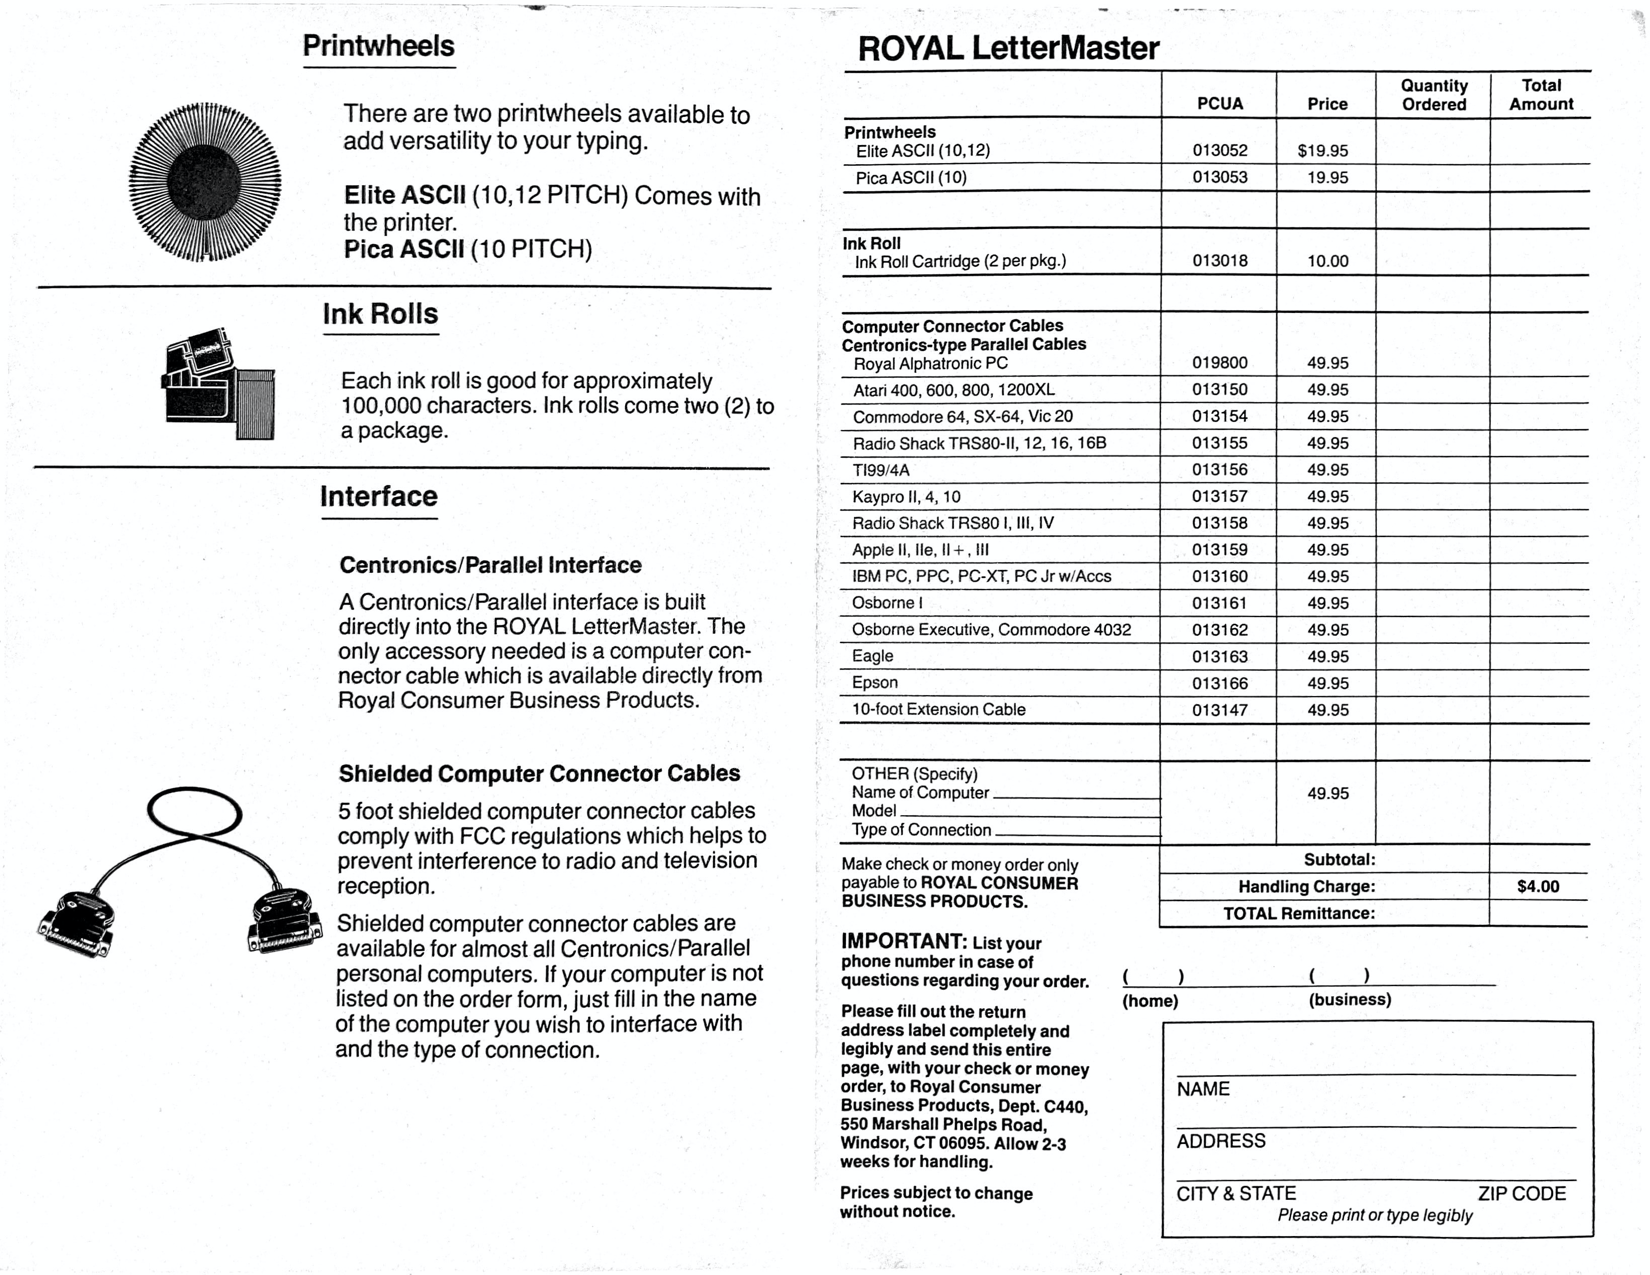
It’s been years since I’ve seen a supplies ordering form. While normally it wouldn’t be all that helpful, it’s interesting to see that piece of history, including that the printer might interfere with nearby radios without a shielded cable.
With some parts numbers in hand, I started by searching for the 013018 “ink roll cartridge” on eBay and Amazon, but that pulled up nothing useful. I also tried a few sites that sold Royal parts, but had no luck. At this point, I was assuming that I needed some kind of ribbon cartridge still.
At some point in the process of looking for the part, I stumbled across this blog series from someone who had bought the same model a few years prior. (Special thanks to the author of those posts, who saved me a lot of time figuring out supplies and operation.)
Turns out that this printer used an ink roller instead of a ribbon. And unfortunately for me, this specific ink roller was made only for a handful of daisy wheel and then shelved as the underlying quickly became obsolete.
While I could perhaps eventually find some new old stock for the roller (the Royal IR-100), it’s not really all that common, and I doubt that a 30 year old roller is going to work much better than the one that came with the printer.
The above blog did point out that a similar (but incompatible) roller was sold under the model number of the Royal IR-40. Interestingly enough, that one is still in common use because it was adopted by a number of printing calculators.
As a sidebar, I noticed is that the IR-40 is compatible with the Canon CP-16, which seems to also be used by a number of Japanese-made calculators. I also noticed that this model, and the other ones in the series (Alpha 100, Beta 200) were made in Japan. It looks like all the ICs on the board in the back are made by Japanese companies, such as Mitsubishi. I’m not completely convinced that this wasn’t engineered by a Japanese company and then rebranded as TA-Royal, but I’d have to do some more research to sort that out.
While I could have returned the printer at this point, it did actually work and was at the right price, so I decided to try to make an adapter from the IR-40 to the IR-100. As a bonus, the IR-40/CP-16 rollers are the least expensive ones that I could find online.
Modeling it with OpenSCAD
The IR-100 part has a peculiar set of dimensions. I’m not really sure how it was fabricated or out of what kind of plastic, but it’s smooth on the bottom and not completely consistent in width. The part sizes don’t exactly match up to millimeter boundaries with a set of calipers, so it was a little bit tricky to measure.
It took a few more hours than I’d hoped, but I finally got to a set of measurements that seemed close enough to correct.
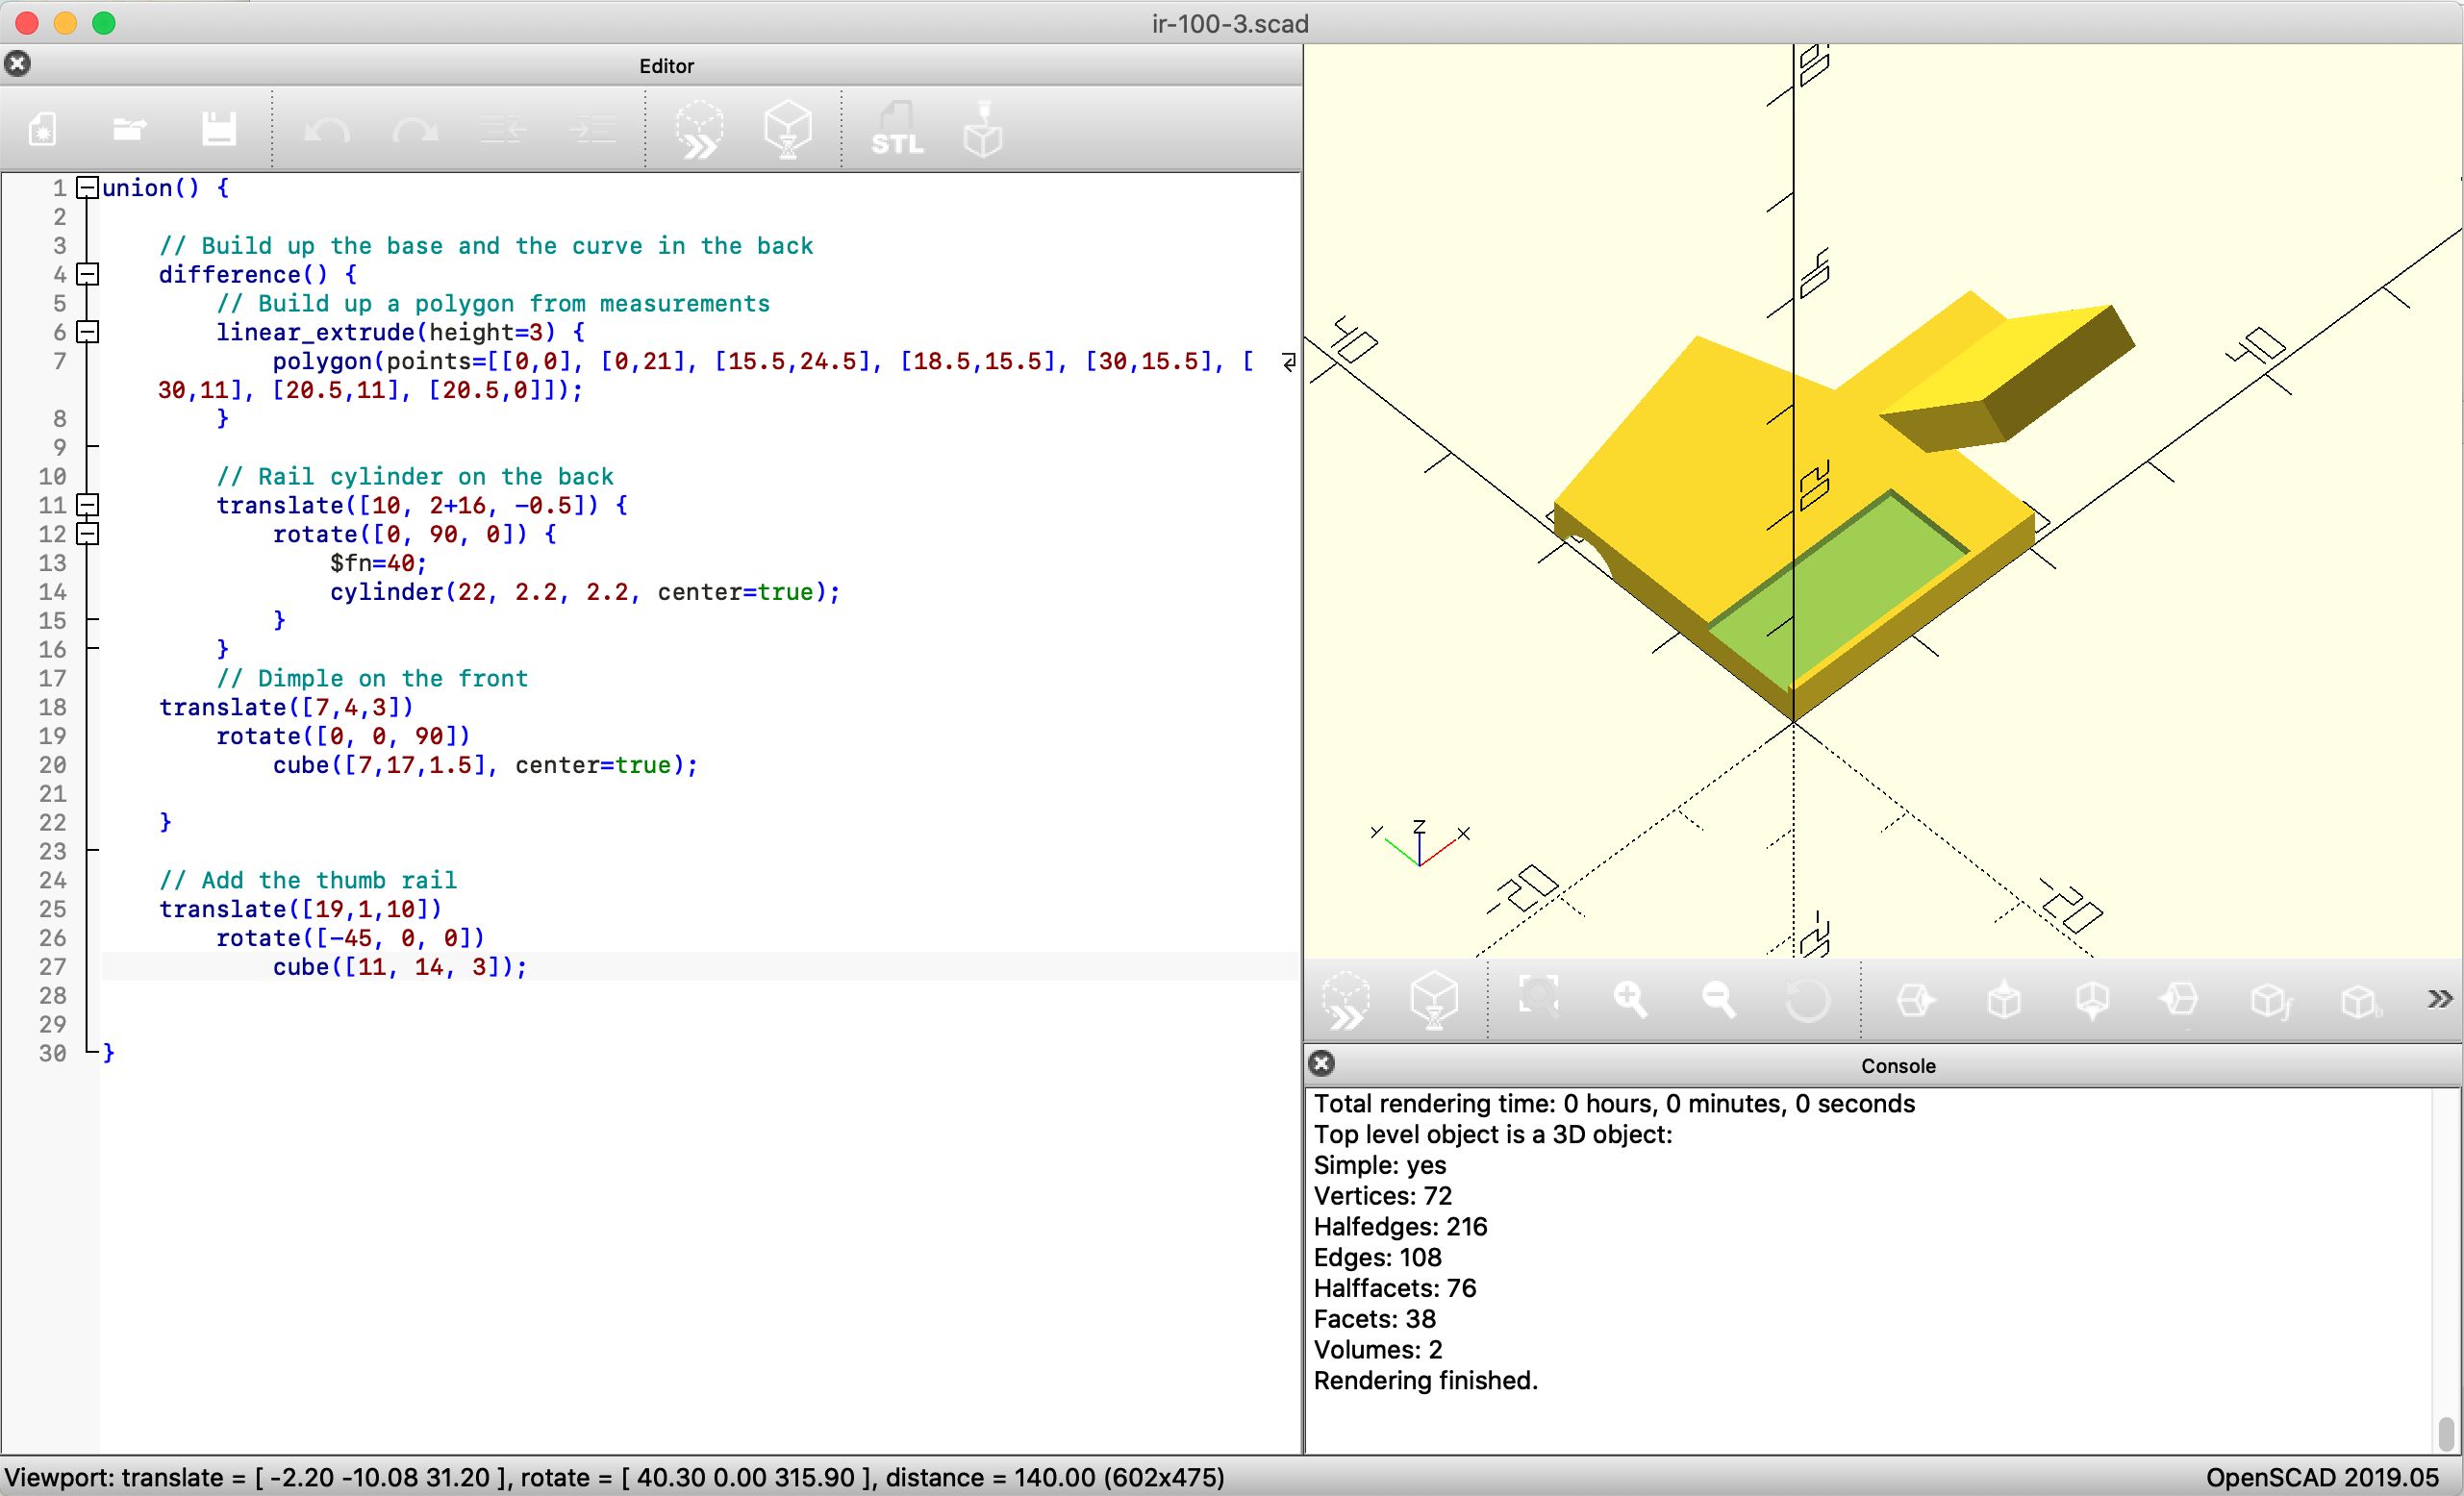
My usual approach to a model like this is to slap some shapes together until it looks right, but I had a hard time getting the right shape doing that. After some trial and error for how to turn the measurements into a model, I ended up representing the measurements as a set of coordinates for a 2D polygon that was extruded a few millimeters.
That resulted in this adapter. To print it, I sliced it with standard settings on Cura 4 and printed it with some scrap PLA on a Creality Ender 3. I was both happy and surprised that it snapped right into place in the LetterMaster on the first try.
Making the IR-40 work with the adapter base
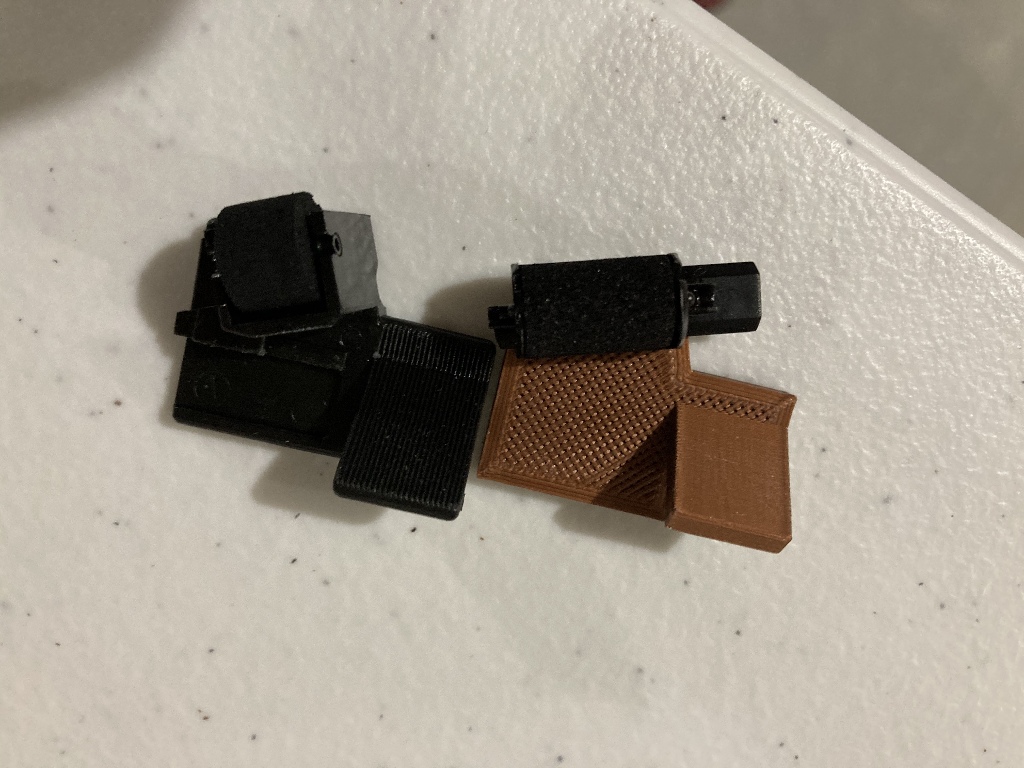
With a printed adapter base ready to go, I wanted to figure out the correct height for a more permanent adapter. Since the roller needs to have just the right dimensions to brush against the daisy wheel and spin, I opted to use some sticky tack to attach the IR-40 until I could come up with a more permanent solution.
With a little bit of testing, I found that around 2.5mm off the platform on the high side and 1.5mm on the low side is about right. The tack holds it on well enough to be good enough for a while.
Printing something other than test sheets

With the ink roller problem mostly solved, the next thing to do was to get it to actually print from a computer.
To plug it into my Mac, I ordered a cheap $9 USB to IEEE 1284 (Centronics) adapter online. If you want the exact model I used, it was the Sabrent CB-CN36, but I’d imagine that anything that works with your computer should be sufficient.
I started by trying to add it as a CUPS raw printer and printing with lp -d. This kind of worked, but I ran into a few problems: Like most line printers, it needed a carriage return in addition to a line feed, and I wasn’t doing that. While the printer is capable of printing 80 characters on a line, there’s a bug that makes it occasionally glitch out on the last character and then change the tab stop. And finally, a character would get dropped somewhere between ever 25-50 characters or so.
The first problem was really easy to solve. Just use MS-DOS style line-endings and end with a CRLF instead of just a LF. The second problem was solved by only printing up to 79 characters per line. The third problem was tricker to sort out because there’s no obvious way to do flow control on CUPS, and this printer only can do about 10 characters per second.
At this point, I was wondering how this is solved for more modern printers. There are plenty of thermal printers, for example, that take text over some protocol and don’t do anything very fancy. With that in mind, I stumbled across the python-escpos library, which uses pyusb for sending data to receipt printers.
Looking into the pyusb library, it’s surprisingly easy to send raw text over USB, so that’s what I did, found that it worked, added some throttling, and ended up with this simple driver script.

So with that, the printer is functional enough to use it for actual printing, even though I’d like to improve the quality. If you’re reading this because you have one of these printers, hopefully you find this helpful.